By Jose Ortiz
A system image backup is an exact duplicate of your hard drive where Windows is installed.
It not only includes all the necessary drives required for Windows to run but it also includes system settings, your favorite programs and all your personal data.
Once a system image backup has been created and saved, it then can be used to restore the contents of your hard drive. This is useful when your hard drive or operating system stops working.
The system image can also be transferred to a new drive. The new drive must be the same size, or larger, as the original one. This process is a complete restoration of your hard drive’s content which will wipe out everything on your drive.
Although a system image will include personal files, it is recommended that you regularly backup your files using Windows backup or your favorite back up software.
By default Windows Backup and Restore will create a system image and backup your data at the same time. This way you can restore each file and folder as needed.
We are going to concentrate on creating a system image only.
I recommend creating a backup at least once a week. This should be part of your regular data backup plan.
You will need two things to create a system image backup.
- First, you will need an USB external storage drive or add another hard drive to your computer.
- Second, you will need a blank CD/DVD disc to create a system repair disc.
How to Create a System Image Backup
Connect the external storage drive to your computer.
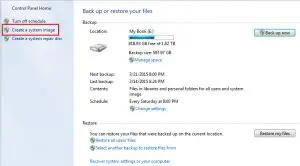
Click on the Windows Start button to open up the Start Menu.
In the search field type Backup and Restore.
At the top, the Start Menu will show Backup and Restore.
Click Create a System Image under Control Panel Home.
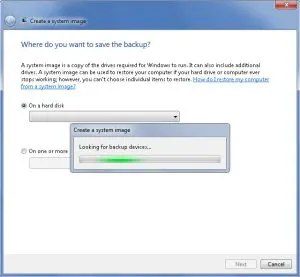
Windows will now look for a backup drive to save the System Image.
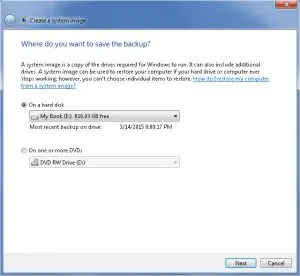
Select your hard disk from the available drives and click Next.
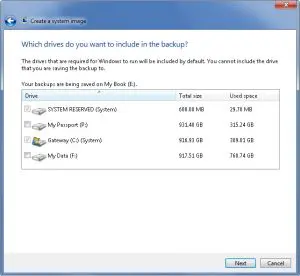
You have the option to include additional drives in the backup. Click Next.
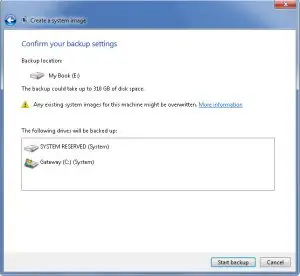
Look over and confirm your backup settings. Click Start backup.
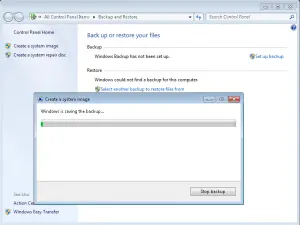
Windows will begin creating a System Image backup.
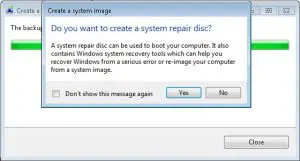
Once the system image backup has been created, you will have the opportunity to create a system repair disc. I suggest you create one. A system repair disc will be needed to boot your computer into Windows recovery environment.
The system repair disc is very useful as it has Windows system recovery tools. It is from this environment where you will restore the system image backup.
How to Create a System Repair Disc
Click Yes to create a system repair disc.
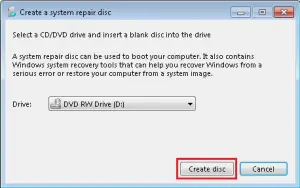
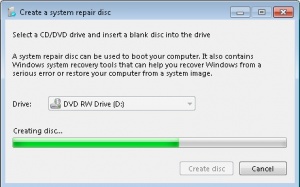
Insert a blank disc into your optical drive and click Create Disc.
Windows will now begin to create a system repair disc.
When the system repair disc has completed, label it as per the instructions. Click Close to exit.
Store this disc in a safe place. This will be a lifesaver if your hard drive or operating system stops functioning.
By having a system image backup, you will not have to go through all the updates that are needed after a fresh install. Plus all your programs and data will be intact.
{Restore Windows 7 from System Image tutorial can be found here.}
If this tutorial has been helpful, please like or share it so others may benefit from it.
PCMechanic Computer Repair in Davenport, Fl can help you create a system image backup for Windows operating systems.
Click the Service Request button below to get in touch with me.


