Gaming laptops are unparalleled in the realm of high-performance computing. However, like any sophisticated machinery, they require regular maintenance. One crucial maintenance aspect is replacing the laptop fan(s). The fan plays a vital role in preventing overheating, ensuring that your device performs optimally during intense gaming sessions. In this blog post, we’ll explore the importance of a gaming laptop fan replacement and provide a step-by-step guide on how to do it.
Why Gaming Laptop Fan Replacement Service is Crucial
Firstly, understanding why fan replacement is essential can help you appreciate its importance. A well-functioning fan keeps your laptop cool, preventing overheating that could damage internal components. Over time, however, fans can wear out due to dust accumulation or mechanical failure. When this happens, you may notice your laptop overheating more frequently or becoming noisier than usual. Ignoring these signs can lead to performance issues and, eventually, hardware failure.
Moreover, an efficient cooling system is vital for maintaining your laptop’s longevity. Constant overheating not only reduces performance but also shortens the lifespan of your device. A gaming laptop fan replacement can prevent these issues and ensure your gaming laptop remains in top condition for years.
After explaining why fan replacement is crucial, let’s explore the practical aspect. Specifically, we’ll discuss the steps involved in replacing a gaming laptop fan. Following these steps ensures that the replacement process is carried out smoothly and efficiently.
Step-by-Step Guide to Gaming Laptop Fan Replacement Service
Before starting, ensure you have the necessary tools: a screwdriver, thermal paste, and a new fan compatible with your laptop model. First, power off your laptop and disconnect all peripherals. Next, unscrew the back panel of your laptop, carefully keeping track of all screws. Then, remove the battery to prevent any electrical mishaps.
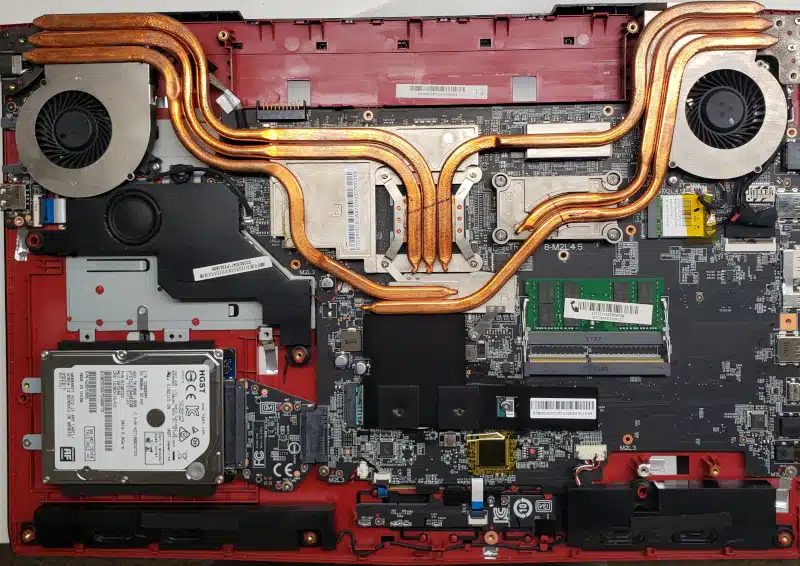
Once you remove the back panel and battery, locate the fan. The fan attaches to the heatsink and screws to the motherboard. (It may also screw to the palm rest.) Disconnect the fan’s power cable from the motherboard.
Most gaming laptops require the heatsink to be entirely removed from the motherboard to replace the fan. The fan comprises the fan base and the fan assembly. The fan base is part of the heatsink, while the fan assembly is removed by tiny little screws. Unscrew the fan from its position. Gently lift it out. Clean out any dust from the heatsink. Now, take your new fan and place it in the same position. Screw the fan securely to the fan base. Apply new thermal paste to the CPU and GPU. I highly recommend fresh thermal paste for optimal cooling performance. Reconnect the power cable after the new fan is in place.
Finally, reconnect the battery, reattach the back panel, and secure it with screws. Reconnect the peripherals, then power on your laptop. Listen for unusual noises and monitor the temperature to ensure the new fan functions correctly.
Conclusion: Keeping Your Gaming Laptop Cool and Efficient
In conclusion, replacing a gaming laptop fan might seem daunting, but it is a manageable task with the right tools and steps. Maintaining your laptop’s cooling system can significantly enhance its performance and longevity. By following this guide, you can ensure that your gaming sessions remain uninterrupted by overheating issues.
For expert gaming laptop fan replacement in Davenport, FL, visit PCMechanic Computer Repair to ensure your device stays cool and performs at its best.
